Sunday, September 29, 2019

Doll House Adventure Part 4

I'm kind of at a holding spot on the bed, so I got to work on the night stands.  This was my inspiration


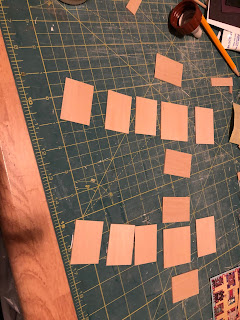
These are the cut pieces for the basic frame.


Basic frame glued together.


And then there were two... sorry, it's upside down!


I wanted a tapered leg for that mid-century modern look - so I borrowed a pencil sharpener from my daughter and cut 8 half inch tapered legs.


Then I sanded the top to an angle so they would stick out a bit!


Here is the unit with it's cute little legs


And now with the little drawers.  I cut the wood for the drawers after finishing the base unit to help ensure fit.


Now all that is left is painting them and figuring out handles...

Sunday, September 15, 2019

Doll House Adventure Part 3

The Headboard is coming along nicely - and I got the bed frame worked on this week - at this point - all that is left is finishing the painting and varnishing and then getting the handles on.   Then we really need to decide on fabric and such so I can start working on the mattress.  


Here's the beginning of the bed frame.


And here's where it's at currently - The headboard and frame are not connected yet just for ease in painting the headboard, but I think they look good together!  I'm planning on staining the doors, but I'm putting that off for now.  


Sunday, September 8, 2019

Doll House Adventure Part 2

So this week I have been working on some Master Bedroom furniture.  I started with a bed - this picture was the inspiration for the bed and headboard.  I'm not crazy about the rest of the pieces though.  


I'm close to getting the bed and headboard done - here's what I have on the headboard so far.  First I planned out the furniture pieces I wanted and tried to figure out the sizes for the room. 


This is the headboard with the main structure in place.  


Here I added the doors - I used pins to hinge them in place - I am mostly happy with it, but being a bit of a perfectionist - it bothers me that they are perfectly straight....  but not enough to go remake the whole thing... 


This is it with a coat of paint - The doors will be a wood stain color like in the above picture.  I will put a back on it - but I want a very thin wood for that - and I need to hit the craft store for a big enough piece.  


I have also been working on the bed frame part - but I will post more on that next week! 

Sunday, September 1, 2019

Doll House Adventure Part 1

This old doll house was made by my Grandfather many many years ago - I have many memories of this doll house - Grandma always kept it at her house out in her garage, and Sandi and I would play with it when we went over to her house.  After she passed away earlier this year, Sandi and I decided to work together to fix it up so our kid could play with it.  We opened it up and found a lot of dust, some cobwebs and wall paper and flooring that was falling off. 


We decided to take it down to bare bones - the wood looks like it's in great shape.  We took off all the wall paper, all the flooring, the roofing (which was just strips of sandpaper) and the old moldering curtains.  Then we cleaned and sanded a bit, along with taking the old carpet off the stairs.


Really, it's already looking much better.  Now we just need to decided what to do with the interior.  We are thinking with the 50's feel of the doll house, that we should furnish it in like style.  Right now the plan is to start with the master bedroom (top left room of the house.)  We have also decided that we would like to lighten it up a lot!