Friday, September 30, 2011

Diaper Bag and Accessories

I saw this diaper bag set shortly after I found out that my younger sister was pregnant with her first baby. I wanted to spoil her, and thought that a good gift would be this diaper bag, stuffed with all the things a new mom needs. This pattern was in the March 09 issue of Crochet!

The first thing that needed to be altered was the colors. I wasn't a huge fan of the bright colors. :) I found some of the instructions hard to understand - mostly when it came to putting the thing together, so I just kinda played around with it until I liked it. I also changed how I did the lining. I made it a bit more complicated, but I think a bit nicer looking too. The pattern suggests just taking a piece of fabric and folding it in half. I actually went to the effort of making the lining fit to the shape of the diaper bag. The pattern also included a changing pad which was a great quick and easy project.


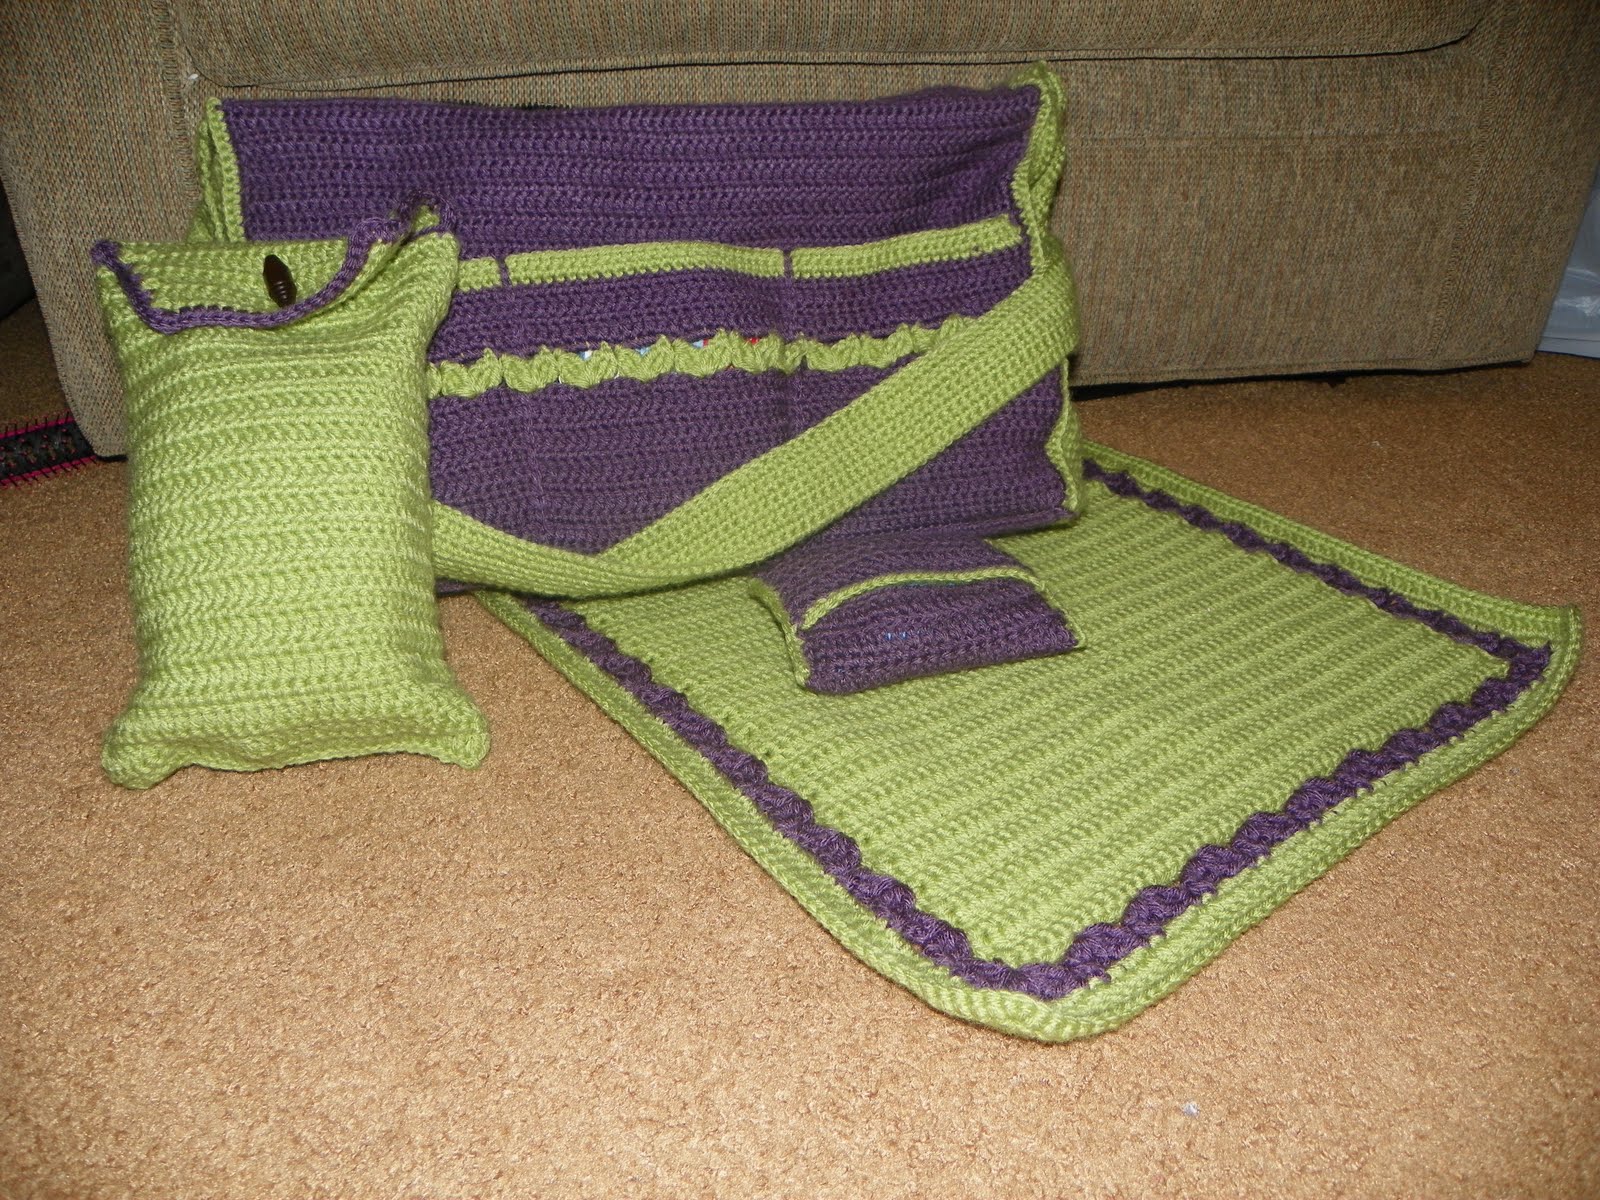
In addition to the pieces of the pattern, I made a few other pieces to go with this set that would also make GREAT quick and easy baby shower gifts. Some of them are shown here in the picture - this was my finished set that I sent off to my sister. I love how it came out - I don't know that I would go to the trouble of the full set for anyone other than my sister, but I really like the finished product.


So I thought I would type out the patterns for the other pieces I made and make them available to you. LOL - this may take a bit of time, but here is the first. The first one is a diaper and wipes carrier. A friend of mine (with more sewing ability than I will ever have...) gave me something like this for a baby shower gift. I LOVED it. I loved having something with diapers and wipes together that I could just grab and take, without having to drag the full diaper bag along if I didn't want to. This carrier will fit a travel wipes case and 4-5 diapers up to size 6. I swear, the button matches better in person.... the flash of the camera seemed to make the greens totally different!


Snag the pattern here as a jpeg - just click on it - then right click and choose 'save image as'


I don't feel comfortable giving the diaper bag pattern out - it isn't my pattern. :( (though I wish it were - lol - but I'm not that clever!) The way I got the pattern from such an old magazine is by signing up for the digital subscription to Crochet! Magazine - it's very inexpensive for a year subscription - plus you can download the back issues too - for me it was SOO worth it - that ended up being over 25 magazines for only $16 - if you want to check it out click here

This pattern is now being offered for free - you can go download it here

Friday, September 23, 2011

Baby Booties and Hat

A friend of mine signed up for the Hook and Needle club through Annie's Attic. She found herself unable to do some of the kits and let me have a few. One of the kits I got was this set of baby booties and hat. Now, the kit comes with instructions for both knit and crochet, but I don't knit well, so I chose crochet. :)

I wasn't crazy about the yarn they sent with the kit - but I don't think I would have minded it so much if the gauge had required a smaller stitch. I like my baby booties to be a tighter and firmer stitch than the patter and gauge allowed - this might have been less noticeable with different yarn, but the combination wasn't my favorite. Despite this, I think they came out cute!

I did do some adjustments to the pattern. The center of the Mary Jane booties was a bit off, so I changed the counting a bit to keep the center of the sock in line with the center of the toe. I also changed the way I did the hat. The pattern had it worked in rows as a flat piece, then had it sewn together to make the round. I worked the piece in rounds - didn't want to make more work for myself than necessary.... I think it worked just fine. I really liked the way the moccasins came out and almost wish I could make myself a pair... :)

I didn't include the moccasins in the picture because I had already given them to a friend with a new baby - I barely remembered to take this pic before I sent the rest off to another friend!

This pattern is only available through the Hook and Needle club and can't be bought on it's own. (At least not as far as I could find!)

I think that if I attempt these again, I will use different yarn, and try a double sole for more stability.

Wednesday, September 21, 2011

Ripple Throw

This was a project for my mother-in-law. I started out by looking at a bunch of ripple patterns, but was unable to find anything I liked. Most of the ones I saw were really ornate, and we had picked out this beautiful boucle yarn that didn't need a fancy stitch. I ended up just making up my own pattern as I went and really liked the way it turned out.

I am perfectionist when it comes to my crocheting, which can mean a LOT of stitches taken out :) What I found about working with the boucle yarn is that it is much more forgiving of accidents. I ended up leaving a lot of mistakes in there because the boucle yarn made them invisible. If you have never worked with these fancy yarns before (and are maybe a bit scared by them) give them a try! They take some getting used to - but are fun once you get going.

I have tried to type the pattern up for you - however I am inexperienced as a pattern writer - so if you give it a try and find problems, or have questions - feel free to leave a comment here and let me know!

The finished size was about 52" x 70" and I used a bit more than 2 Skeins of Sensations Rainbow Boucle Patterns Yarn - The Skeins are 11 oz each - I would say I used less than 30 oz of the yarn.

The pattern is a PDF file - you can download it here

And if the download is giving you trouble - here is the jpeg. Just right click the image and select "save image as"

Floral Stripes 18-inch Doll Outfit

Ok - First up is this outfit which I made for my daughter for her birthday. The one I made was one pattern in a set of 3. I made the one on the left. Overall - I really liked the way the pattern worked. It was easy to understand, mostly simple stitches and turned out looking good. I got the pattern at Annie's Attic and used yarn that I got from Jo Ann's, Hobby Lobby and Walmart. My main gripe is that the printed version they sent me smudged when it got a bit damp (courtesy of one of my kids....)

I also added a lining to the purse. I basically took the purse pattern and made it again, but on the row where you stitch in back look only, I stitched in the front loop only, to put the pretty side on the inside :) I really like how the purse turned out with the lining

I also made a little bracelet which you can't see in the picture, because the purse is covering it.... I just made a chain as long as her wrist then joined it to make a circle. Then i sc in each stitch around. I made a small flower and attached it with a button. If I get around to it, I might even make a larger one for my daughter to match it.... :)

So here is how my attempt came out. I dressed up my daughters doll in the outfit and we had a little photo shoot :P The variegated yarn I used created a totally different look - but I still like it. I might even make this again in different colors for my next daughter... Oooo the joy of girls and making doll clothes!

Tuesday, September 20, 2011

My Crafting Blog

Well - I have decided to start this blog dedicated to my crafting - mostly to Crochet and Sewing. My plan is to show off stuff I've made, let you know what pattern I used, how well I liked the pattern, any adjustments I made to it, and how well I liked the finished product, and if I remember - where I got the pattern. :) And maybe someday, if I ever finish one of my patterns, I will share those too. :)

Anyway, don't know if anyone will read this, but either way, it will be a record for me. :)